At ValidExamDumps, we consistently monitor updates to the Oracle 1Z0-1065-23 exam questions by Oracle. Whenever our team identifies changes in the exam questions,exam objectives, exam focus areas or in exam requirements, We immediately update our exam questions for both PDF and online practice exams. This commitment ensures our customers always have access to the most current and accurate questions. By preparing with these actual questions, our customers can successfully pass the Oracle Fusion Cloud Procurement 2023 Implementation Professional exam on their first attempt without needing additional materials or study guides.
Other certification materials providers often include outdated or removed questions by Oracle in their Oracle 1Z0-1065-23 exam. These outdated questions lead to customers failing their Oracle Fusion Cloud Procurement 2023 Implementation Professional exam. In contrast, we ensure our questions bank includes only precise and up-to-date questions, guaranteeing their presence in your actual exam. Our main priority is your success in the Oracle 1Z0-1065-23 exam, not profiting from selling obsolete exam questions in PDF or Online Practice Test.
Manage Locations
Scenario:
Your organization, headquartered in Redwood City, CA, zip code 94065, is implementing Oracle Procurement Cloud.
Task 1
Create a Location for your purchasing headquarters, where:
. Location is linked to US Location Set
. Name of the location is PRCXX Location (Replace xx with 01, which is your allocated User ID.)
. Location code is PRCXXLOC (Replace XX with 01, which is your allocated User ID.)
* Address line is 1000 Main St
. Location is active

To create a location for your purchasing headquarters, you can follow these steps:
Navigate to the Setup and Maintenance work area and search for the Manage Locations task.
Click on the Go to Task icon to open the Manage Locations page.
Click on the Create icon to create a new location.
Enter the following information in the Create Location dialog box:
Location Set: US Location Set
Name: PRC01 Location
Code: PRC01LOC
Address Line 1: 1000 Main St
City: Redwood City
State: CA
Postal Code: 94065
Country: United States
Check the Active check box to make the location active.
Click on the Save and Close button to save the location.
You have successfully created a location for your purchasing headquarters. You can verify the location details by searching for it in the Manage Locations page.
OR use the following:
Following the scenario, we need to create a Location in Oracle Procurement Cloud for your purchasing headquarters in Redwood City, CA, with the following details:
Location Set:US Location Set
Name:PRCXX Location (Replace xx with 01)
Code:PRCXXLOC (Replace xx with 01)
Address:1000 Main St,Redwood City,CA,94065
Status:Active
Here are the steps to create the location:
Navigate to Manage Locations:
Go to the Global Navigation Menu.
Click onWorkforce Structures.
Click onLocationsunder My Client Groups.
Create the Location:
Click on theCreateicon (+ icon).
Enter the Location Information:
Location Set:Select 'US Location Set' from the dropdown list.
Name:Enter 'PRCXX Location' (replace xx with 01).
Code:Enter 'PRCXXLOC' (replace xx with 01).
Address:
Enter '1000 Main St' in Address Line 1.
Enter 'Redwood City' in the City field.
Select 'CA' from the State dropdown list.
Enter '94065' in the Postal Code field.
Status:Select 'Active' from the dropdown list.
Save the Location:
Click on theSavebutton.
Verification:
The Location 'PRCXX Location' (replace xx with 01) should now be listed in the Manage Locations page.
You can verify the details of the location by clicking on it.
Your customer requires any approved requisition to be reapproved whenever a buyer updates a catalog requisition line during requisition processing.
How must they set this up?
This option enables the customer to require any approved requisition to be reapproved whenever a buyer updates a catalog requisition line during requisition processing. This ensures that any changes made by the buyer are reviewed and approved by the appropriate authority before the requisition is converted to a purchase order.
You want to send your purchasing documents from a specific organization-wide email address.
What task would you use to set this up?
To send your purchasing documents from a specific organization-wide email address, you need to use the task Manage Purchasing Profile Options. This task allows you to configure various profile options that control the behavior and functionality of the Purchasing application. One of these profile options isPO: Email Sender Address, which specifies the email address that appears in the From field of the email notifications sent to suppliers and internal users. You can set this profile option at the site level to apply it to all business units, or at the product level to apply it to a specific business unit.
Implement Procurement - docs.oracle.com
PRC:PO: Supplier Communication from Email Address ... - My Oracle Support
PRC:PO: Sending Purchase Order (PO) Email ... - My Oracle Support
To improve usability and reduce errors, you have set a default negotiation template for each document type when creating or editing a negotiation style.
This feature is always enabled but you do not always see the template that was set on the negotiation style defaulting in.
What could be two reasons for this?
The default negotiation template for each document type is only applied when creating or editing a negotiation style if the template is active and public. If the template is inactive or private, the template will not be defaulted in. Therefore, the two reasons why you do not always see the template that was set on the negotiation style defaulting in are:
The template is inactive at the time of creating the negotiation. An inactive template cannot be used for creating or editing negotiations, and it will not be displayed in the list of available templates. You need to activate the template before you can use it as a default template.
It is a private template where only the template owner can use it. A private template is only visible and accessible to the user who created it, and it will not be shared with other users. You need to make the template public if you want to use it as a default template for all users.
Challenge 4
Manage Inventory Organizations
Scenario:
Your procurement organization requires you to create an inventory organization, which will be used for issuing and receiving procurement transactions.
Task:
Create an Inventory Organization to receive procurement transactions, where:
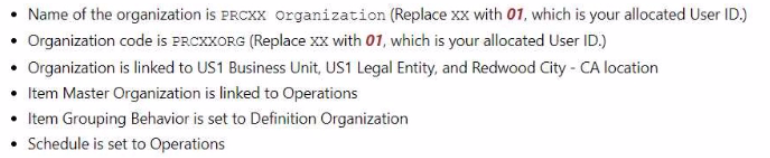
. Name of the organization is PRCXX Organization (Replace xx with 01, which is your allocated User ID.)
. Organization code is PRCXXORG (Replace xx with 01, which is your allocated User ID.)
. Organization is linked to US1 Business Unit, US1 Legal Entity, and Redwood City - CA location
. Item Master Organization is linked to Operations
. Item Grouping Behavior is set to Definition Organization
. Schedule is set to Operations
To create an Inventory Organization to receive procurement transactions, you can follow these steps:
Navigate to the Setup and Maintenance work area and search for the Manage Inventory Organizations task.
Click on the Go to Task icon to open the Manage Inventory Organizations page.
Click on the Create icon to create a new inventory organization.
Enter the following information in the Create Inventory Organization dialog box:
Name: PRC01 Organization
Code: PRC01ORG
Business Unit: US1
Legal Entity: US1
Location: Redwood City - CA
Item Master Organization: Operations
Item Grouping Behavior: Definition Organization
Schedule: Operations
Click on the Save and Close button to save the inventory organization.
Or use the following steps:
Following the scenario, we need to create a new Inventory Organization in Oracle Procurement Cloud named 'PRCXX Organization' (replace xx with 01) to receive procurement transactions.
Here are the steps to create the Inventory Organization:
Navigate to Manage Inventory Organizations:
Go to the Global Navigation Menu.
Click onSupply Chain.
Click onSetup and Maintenance.
Click onInventory Organizations.
Create the Inventory Organization:
Click on theCreateicon (+ icon).
Enter the Inventory Organization Information:
Name:Enter 'PRCXX Organization' (replace xx with 01).
Organization Code:Enter 'PRCXXORG' (replace xx with 01).
Business Unit:Select 'US1 Business Unit'.
Legal Entity:Select 'US1 Legal Entity'.
Location:Select 'Redwood City - CA'.
Item Master Organization:Select 'Operations'.
Item Grouping Behavior:Select 'Definition Organization'.
Schedule:Select 'Operations'.
Description:(Optional) Enter a brief description of the inventory organization.
Define Item Sourcing Details:
Click on theItem Sourcing Detailstab.
Click on theCreateicon (+ icon).
Enter the item sourcing details for your organization,including:
Picking Defaults
Inventory Lead Time
Supply Subinventory
Shipping Rules
Click on theSave and Closebutton.
Save the Inventory Organization:
Click on theSavebutton.
Verification:
The Inventory Organization 'PRCXX Organization' (replace xx with 01) should now be listed in the Manage Inventory Organizations page.
You can verify the details of the organization by clicking on it.
The linked Business Unit,Legal Entity,Location,Item Master Organization,Item Grouping Behavior,and Schedule should be displayed as specified above.
Additionally,the Item Sourcing Details should reflect the defined values for picking,lead time,subinventory,and shipping rules.
Additional Notes:
Make sure to replace 'xx' with your allocated User ID (01) in both the Inventory Organization name and code for consistent naming convention.
The Item Master Organization defines the organization responsible for managing item information.
The Item Grouping Behavior determines how items are grouped for inventory purposes.
The Schedule defines the calendar used for scheduling inventory transactions.
Carefully review and configure the Item Sourcing Details to ensure proper receipt and fulfillment of procurement transactions within your organization.